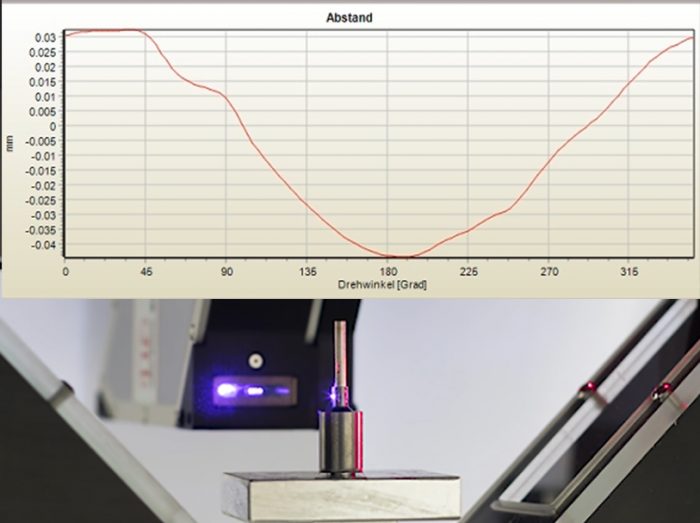
imess U100 inspects runout and concentricity of components in the line.

Various characteristics of inspection are recorded by camera and optionally by laser. These include:

Tolerances of Position

  • Location tolerances: concentricity / coaxiality

  • Directional tolerances: perpendicularity

Running tolerances (for rotationally symmetrical assemblies)

  • Runout

Concept

Integration into the production line for 100% control

The procedure for inspection of tolerances is extremely simple thanks to an innovative and smart concept. Parts that have low stability due to their shape or weight are passed around by a camera while the U100 T system is at a standstill. Vibrations triggered by its own movement and therefore measurement inaccuracies are thus avoided. Furthermore, it is suitable for integration into a production line so that the parts do not have to be removed for testing.

During rotation, the camera continuously takes images of the component in small steps. In parallel, further checks, such as the quality assessment of crimping points, can also be integrated by laser.

Feature

imess inspects location and directional tolerances

high Accuracy

Telecentric objectives have an impressive depth of field and enable highly accurate measurements. Perspective distortions of the specimen are eliminated. Regardless of the camera distance, the test object always appears the same size in the transmitted image.

Integration into production line

Camera and laser can also be integrated into existing lines to ensure reliable 100% control.

user-friendly Software

Intuitive and easy-to-understand visualization of the complex test results. The results of the target/actual comparison are displayed both in tabular and graphical form, so that tolerance violations can be quickly understood.

The innovative testing concept prevents

vibrations of the component and

thus inaccuracies

Software

User-friendly software for evaluation and documentation

  • graphical and tabular presentation of the measurement results

  • Interface to control system

  • Password protected parameterization

  • Export of the measured values as CSV file

Variants

stationary inspection of component tolerances

imess U100 | Single inspection station

Parts that have a low stability due to their shape or weight are bypassed by a camera while they are at standstill.